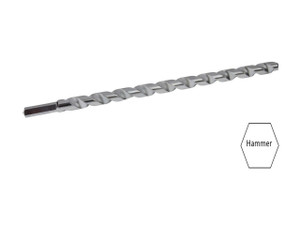
Description
- Qualified for static and seismic loading conditions
- Thread design undercuts to efficiently transfer the load to the base material
- No special drill bit required; designed to install using standard-sized ANSI tolerance drill bits
- Hex-washer head requires no separate washer and provides a clean installed appearance
- Carbon steel Titen HD utilizes a specialized heat-treating process that creates tip hardness for better cutting without compromising the ductility
- Zinc-plated carbon steel anchor can be used for temporary exterior applications
- Size: 1/2 in. x 15 in.
- Caution: Use a Titen HD screw anchor one time only — installing the anchor multiple times may result in excessive thread wear and reduce load capacity
- Quantity: 5
| Bit Size | 1/2" |
| Minimum Embedment | See PDF |
| Box Qty | 5 |
| Type | Male |
| Material | Carbon Steel |
| Environment | Dry |
| Minimum Spacing | See PDF |
| Minimum Edge Distance | See PDF |
| Maximum Fixture Thickness | See PDF |
| Minimum Fixture Hole Diameter (In Place) | See PDF |
| Minimum Fixture Hole Diameter (Hole Spotted) | See PDF |
| Maximum Torque | See PDF |
| Wrench Size For Nut | 3/4 |
| Brand Name | Simpson Strong-Tie |
The information on this page is intended for preliminary guidance only. For complete safety and to verify accurate information, please consult the (PDF linked below) to obtain the manufacturer’s values when selecting the anchors for your project.
The Titen HD anchor is a high-strength screw anchor for concrete and masonry. It is designed for optimum performance in both cracked and uncracked concrete. The high-strength, easy-to-install Titen HD anchor has been tested and shown to provide outstanding performance in cracked and uncracked concrete under both static and seismic loading conditions. The self-undercutting, non-expansion characteristics of the Titen HD anchor make it ideal for structural applications, even at reduced edge distances and spacings. Recommended for permanent dry, interior non-corrosive environments or temporary outdoor applications.
Installation
- Drill a hole in the base material using a carbide drill bit the same diameter as the nominal diameter of the anchor to be installed. Drill the hole to the specified embedment depth plus minimum hole depth overdrill (see table below) to allow the thread tapping dust to settle, and blow it clean using compressed air. (Overhead installations need not be blown clean.) Alternatively, drill the hole deep enough to accommodate embedment depth and the dust from drilling and tapping.
- Insert the anchor through the fixture and into the hole.
- Tighten the anchor into the base material until the hex-washer head contacts the fixture.
| Titen HD Diameter (in.) | Wrench Size (in.) | Recommended Fixture Hole Size (in.) | Min. Hole Depth Overdrill (in.) |
|---|---|---|---|
| Suggested fixture hole sizes are for structural steel thicker than 12 gauge only. Larger holes are not required for wood or thinner cold-formed steel members. | |||
| 1/4 | 3/8 | 3/8 to 7/16 | 1/8 |
| 3/8 | 9/16 | 1/2 to 9/16 | 1/4 |
| 1/2 | 3/4 | 5/8 to 11/16 | 1/2 |
| 5/8 | 15/16 | 3/4 to 13/16 | 1/2 |
| 3/4 | 1 1/8 | 7/8 to 15/16 | 1/2 |
Caution
- Holes in metal fixtures to be mounted should match the diameter specified in the table below.
- Use a Titen HD screw anchor one time only — installing the anchor multiple times may result in excessive thread wear and reduce load capacity.
- Do not use impact wrenches to install into hollow CMU.
- Oversized holes in base material will reduce or eliminate the mechanical interlock of the threads with the base material and reduce the anchor’s load capacity.
- Installation of concrete screw generally is influenced by many factors such as but not limited to, concrete compressive strength, type of aggregate, installation location, installation direction and tools used for installation.
![]() Product Information (on Simpson Website)
Product Information (on Simpson Website)
Package information
0 in. x 0 in. x 0 in., 5.15 lbs.
California Prop 65 WARNING! Cancer -www.P65Warnings.ca.gov
Carton Reference 20707392753203
Pallet Reference 60707392753201


