
Installation Instructions for the Concrete Wedge Anchor
Installing wedge anchors can be completed in five easy steps. Wedge anchors can be used in solid concrete applications, are best suited for light to heavy duty fastening purposes, are available in diameters from 1/4" up to 1-1/4", and are available in standard zinc plated, hot dipped galvanized and stainless steel. To determine the minimum anchor length for your application, simply add the material thickness to the minimum embedment and add the thickness of the nut & washer.
Installation steps:
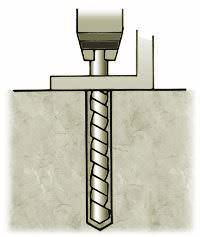
- Drill a hole in the concrete at least 1/2" deeper than the wedge anchor embedment using a hammer drill and a correctly sized carbide tipped bit. (Hole size is wedge anchor size).
- Clean out the hole of all debris.
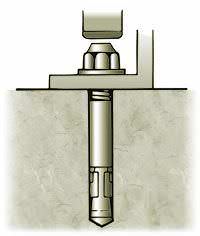
- Place the nut on the end of the wedge anchor (to protect the threads of the wedge anchor during installation).
- Hammer the wedge anchor into the hole deep enough so that the threads are below the surface of the base material.
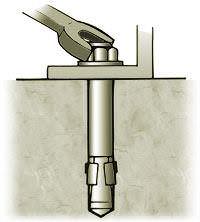
- Tighten the nut - turning approximately three or four full turns.
To find out, even more, take a look at this detailed article about the Proper Selection and Installation of Wedge Anchors.